前三篇我们完成了 DRA 的部署实战、核心概念拆解和工作流程分析。但一直使用的是 NVIDIA 官方的 DRA Driver,如果我们的硬件不是 GPU,或者只是想暴露自定义资源给 Pod 使用,该怎么办?
本文从零实现一个自定义 DRA Driver —— i-dra-driver,沿用之前 Device Plugin 文章 中的 “gopher” 资源隐喻,将节点上的文件作为设备暴露给 Pod。通过对比同一个功能在 DevicePlugin 和 DRA 两种框架下的实现差异,加深对 DRA 机制的理解。
完整源码 : github.com/lixd/i-dra-driver
1. DevicePlugin vs DRA:实现差异对比
在开始编码之前,先通过一张表直观对比两种框架在实现同一个功能时的差异:
维度 DevicePlugin DRA 设备发现 ListAndWatch gRPC 上报设备列表创建 ResourceSlice API 对象 资源可见性 Node capacity 字段(只有数量) ResourceSlice 对象(含完整属性)调度参与 调度器不参与,kubelet 本地分配 调度器参与,PreFilter/Filter/Reserve 设备选择 只能按数量申请 CEL 表达式精确匹配属性 设备注入 Allocate 返回 env/mountsCDI spec 定义注入规则 注册方式 kubelet Registration gRPC plugins_registry socket 核心接口 ListAndWatch + AllocatePrepareResourceClaims + UnprepareResourceClaims辅助库 无(直接实现 gRPC) k8s.io/dynamic-resource-allocation/kubeletplugin
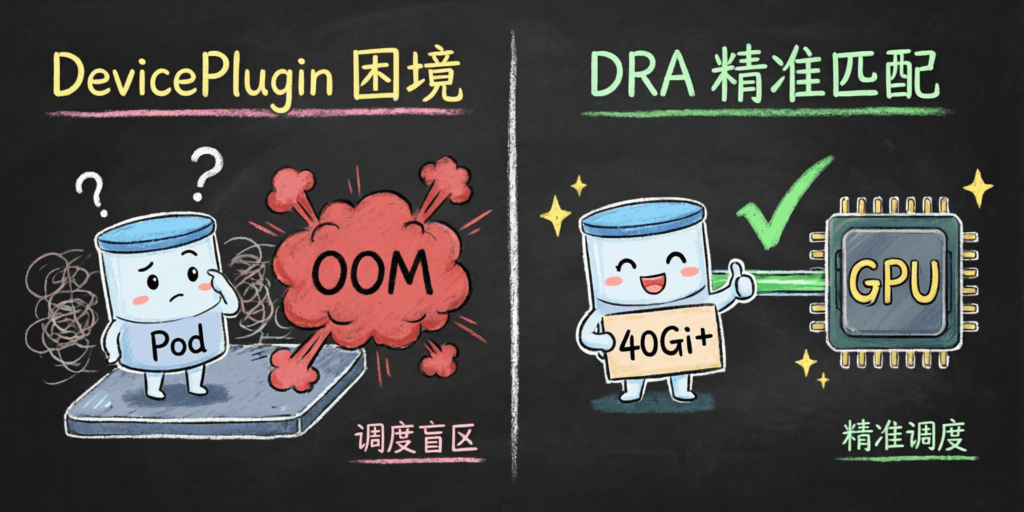
一句话总结 :DevicePlugin 是 “kubelet 本地管理”,DRA 是 “API Server 全局调度 + CDI 标准注入”。
2. 设备发现与 ResourceSlice
2.1 设备发现
DevicePlugin 通过 ListAndWatch 流式上报设备,而 DRA Driver 需要将设备信息写入 ResourceSlice API 对象。
pkg/device/discovery.go:
 1
 2
 3
 4
 5
 6
 7
 8
 9
10
11
12
13
14
15
16
17
18
19
20
21
22
23
24
25
26
27
28
29
type DeviceInfo struct {
Name string
Type string
Size int64
}
func Discover ( devicePath string ) ([] DeviceInfo , error ) {
var devices [] DeviceInfo
info , err := os . Stat ( devicePath )
if err != nil {
if os . IsNotExist ( err ) {
klog . Warningf ( "device path %s does not exist" , devicePath )
return devices , nil
}
return nil , fmt . Errorf ( "stat device path %s failed: %w" , devicePath , err )
}
err = filepath . WalkDir ( devicePath , func ( path string , d fs . DirEntry , err error ) error {
// ...遍历目录,每个文件作为一个设备...
devices = append ( devices , DeviceInfo {
Name : d . Name (),
Type : "gopher" ,
Size : fi . Size (),
})
return nil
})
return devices , err
}
与 DevicePlugin 的区别 :
DevicePlugin 的 ListAndWatch 是一个长连接流 ,设备变化时主动推送 DRA Driver 的 Discover 是一个普通函数 ,调用后返回当前设备列表,变化通过定期 rescan 或后续更新 ResourceSlice 来体现 2.2 构建 ResourceSlice
pkg/device/resourceslice.go:
 1
 2
 3
 4
 5
 6
 7
 8
 9
10
11
12
13
14
15
16
17
18
19
20
21
22
23
24
25
26
27
28
29
func BuildDriverResources ( nodeName string , devices [] DeviceInfo ) resourceslice . DriverResources {
driverDevices := make ([] resourceapi . Device , 0 , len ( devices ))
for _ , dev := range devices {
driverDevices = append ( driverDevices , resourceapi . Device {
Name : dev . Name ,
Attributes : map [ resourceapi . QualifiedName ] resourceapi . DeviceAttribute {
resourceapi . QualifiedName ( common . DriverName + "/type" ): {
StringValue : ptrTo ( dev . Type ),
},
},
Capacity : map [ resourceapi . QualifiedName ] resourceapi . DeviceCapacity {
resourceapi . QualifiedName ( common . DriverName + "/size" ): {
Value : * resource . NewQuantity ( dev . Size , resource . DecimalSI ),
},
},
})
}
return resourceslice . DriverResources {
Pools : map [ string ] resourceslice . Pool {
nodeName : {
Slices : [] resourceslice . Slice {
{ Devices : driverDevices },
},
},
},
}
}
关键点 :
Attributes 存放字符串/布尔/版本等设备属性,可用于 CEL 选择器筛选Capacity 存放数值型容量信息(如文件大小、GPU 显存)这比 DevicePlugin 只能上报数量(nvidia.com/gpu: "4")强大得多 3. DRAPlugin 接口实现
这是 DRA Driver 的核心:实现 kubeletplugin.DRAPlugin 接口的三个方法。
3.1 接口定义
1
2
3
4
5
6
7
type DRAPlugin interface {
PrepareResourceClaims ( ctx context . Context , claims [] * resourceapi . ResourceClaim ) (
map [ types . UID ] PrepareResult , error )
UnprepareResourceClaims ( ctx context . Context , claims [] NamespacedObject ) (
map [ types . UID ] error , error )
HandleError ( ctx context . Context , err error , msg string )
}
3.2 PrepareResourceClaims
当 kubelet 需要为 Pod 准备设备时调用。我们需要:
从 ResourceClaim 的 status.allocation 中提取已分配的设备 为这些设备创建 CDI spec 返回 CDI device ID 列表 1
2
3
4
5
6
7
8
9
10
11
12
13
14
15
16
17
18
19
20
21
22
23
24
25
26
27
28
29
func ( p * GopherDRAPlugin ) PrepareResourceClaims ( ctx context . Context ,
claims [] * resourceapi . ResourceClaim ) ( map [ types . UID ] kubeletplugin . PrepareResult , error ) {
result := make ( map [ types . UID ] kubeletplugin . PrepareResult )
for _ , claim := range claims {
// 提取已分配的 gopher 设备名称
deviceNames := p . extractAllocatedDevices ( claim )
// 创建 CDI spec 文件,返回 CDI device ID
cdiDeviceIDs , err := p . cdiHandler . CreateClaimSpec (
string ( claim . UID ), deviceNames )
// 构建返回结果
for _ , req := range claim . Status . Allocation . Devices . Results {
if req . Driver == common . DriverName {
devices = append ( devices , kubeletplugin . Device {
Requests : [] string { req . Request },
PoolName : req . Pool ,
DeviceName : req . Device ,
CDIDeviceIDs : cdiDeviceIDs ,
})
}
}
result [ claim . UID ] = kubeletplugin . PrepareResult { Devices : devices }
}
return result , nil
}
与 DevicePlugin Allocate 的区别 :
DevicePlugin Allocate DRA PrepareResourceClaims 输入 容器维度(ContainerAllocateRequest) ResourceClaim 维度(可能跨容器) 设备确定 kubelet 本地决定 调度器已分配,status.allocation 指定 注入方式 返回 env/mounts/devices 返回 CDI device ID 幂等性 非强制 必须幂等
3.3 UnprepareResourceClaims
Pod 删除时调用,清理 CDI spec:
1
2
3
4
5
6
7
8
9
func ( p * GopherDRAPlugin ) UnprepareResourceClaims ( ctx context . Context ,
claims [] kubeletplugin . NamespacedObject ) ( map [ types . UID ] error , error ) {
result := make ( map [ types . UID ] error )
for _ , claim := range claims {
result [ claim . UID ] = p . cdiHandler . DeleteClaimSpec ( string ( claim . UID ))
}
return result , nil
}
注意 :此方法只收到 NamespacedObject(UID + Name + Namespace),拿不到完整的 ResourceClaim 对象,因为 claim 可能已被删除。必须幂等 。
3.4 HandleError
辅助库的后台错误回调:
1
2
3
4
5
6
7
func ( p * GopherDRAPlugin ) HandleError ( ctx context . Context , err error , msg string ) {
if errors . Is ( err , kubeletplugin . ErrRecoverable ) {
klog . Warningf ( "recoverable error: %s: %v" , msg , err )
return
}
klog . Fatalf ( "fatal error: %s: %v" , msg , err )
}
可恢复错误(如 ResourceSlice 更新暂时失败)只记录日志,致命错误则退出进程。
4. CDI 设备注入
CDI (Container Device Interface) 是 DRA 的设备注入机制。Driver 创建 CDI spec 文件,容器运行时读取后按 spec 将设备注入容器。
对于我们的 “gopher” 设备,CDI spec 主要负责注入环境变量。文件挂载通过 Pod 的 hostPath volume 实现(因为普通文件的 bind mount 通过 CDI 注入时存在兼容性问题,hostPath volume 是更可靠的方式)。
pkg/cdi/handler.go:
1
2
3
4
5
6
7
8
9
10
11
12
13
14
15
16
17
18
19
20
21
22
23
24
25
26
func ( h * Handler ) CreateClaimSpec ( claimUID string , deviceNames [] string ) ([] string , error ) {
spec := & cdispec . Spec {
Kind : h . kind (), // "gopher.example.com/gopher"
Devices : [] cdispec . Device {},
}
var cdiDeviceIDs [] string
for _ , devName := range deviceNames {
cdiDeviceName := fmt . Sprintf ( "%s-%s" , claimUID , devName )
cdiDeviceID := fmt . Sprintf ( "%s/%s=%s" , h . vendor , h . class , cdiDeviceName )
cdiDeviceIDs = append ( cdiDeviceIDs , cdiDeviceID )
device := cdispec . Device {
Name : cdiDeviceName ,
ContainerEdits : cdispec . ContainerEdits {
Env : [] string {
fmt . Sprintf ( "GOPHER=%s" , strings . Join ( deviceNames , "," )),
},
},
}
spec . Devices = append ( spec . Devices , device )
}
specName := cdiapi . GenerateTransientSpecName ( h . vendor , h . class , claimUID )
return cdiDeviceIDs , h . cache . WriteSpec ( spec , specName )
}
与 DevicePlugin Allocate 的注入方式对比 :
DevicePlugin DRA + CDI 环境变量 Allocate 返回 Envs mapCDI spec 的 ContainerEdits.Env 文件挂载 Allocate 返回 MountsCDI spec 的 ContainerEdits.Mounts 或 Pod hostPath volume 设备节点 Allocate 返回 DevicesCDI spec 的 ContainerEdits.DeviceNodes 标准 Kubernetes 私有 OCI 标准规范
CDI 是开放容器标准,不绑定 Kubernetes,容器运行时原生支持。对于 GPU 等真实硬件设备,CDI 的 DeviceNodes 和 Mounts 是首选注入方式;对于文件类的简单设备,环境变量 + hostPath volume 的组合更实用。
5. 主入口
cmd/main.go:
 1
 2
 3
 4
 5
 6
 7
 8
 9
10
11
12
13
14
15
16
17
18
19
20
21
22
23
24
25
26
27
28
29
30
31
32
33
34
func main () {
// 解析参数
flag . StringVar ( & nodeName , "node-name" , "" , "Node name (or NODE_NAME env)" )
flag . StringVar ( & devicePath , "device-path" , "/etc/gophers" , "Device path" )
flag . DurationVar ( & rescanInterval , "rescan-interval" , 60 * time . Second , "Rescan interval" )
// 创建 k8s 客户端
cfg , _ := rest . InClusterConfig ()
kubeClient , _ := kubernetes . NewForConfig ( cfg )
// 创建 CDI handler
cdiHandler , _ := cdi . NewHandler ( driverName , "gopher.example.com" , "gopher" , devicePath )
// 创建 DRA Plugin
draPlugin := plugin . NewGopherDRAPlugin ( cdiHandler )
// 启动 DRA Plugin Helper(注册到 kubelet + gRPC server)
helper , _ := kubeletplugin . Start ( ctx , draPlugin ,
kubeletplugin . DriverName ( driverName ),
kubeletplugin . KubeClient ( kubeClient ),
kubeletplugin . NodeName ( nodeName ),
)
defer helper . Stop ()
// 发现设备并发布 ResourceSlice
devices , _ := device . Discover ( devicePath )
resources := device . BuildDriverResources ( nodeName , devices )
helper . PublishResources ( ctx , resources )
// 定期 rescan
go rescanLoop ( ctx , helper , nodeName , devicePath , rescanInterval )
<- ctx . Done ()
}
与 DevicePlugin 启动流程对比 :
步骤 DevicePlugin DRA Driver 启动 gRPC Server 手动创建 grpc.Server + 监听 unix socket kubeletplugin.Start 自动处理注册到 Kubelet 手动连接 KubeletSocket 发送 RegisterRequest kubeletplugin.Start 自动处理发布设备信息 ListAndWatch 流式推送helper.PublishResources() 创建 ResourceSlice监听 Kubelet 重启 手动 fsnotify 监听 socket 辅助库自动处理
DRA 的 kubeletplugin.Start 一行代码就解决了 DevicePlugin 需要几十行代码处理的注册和生命周期管理。
6. 部署与测试
以下在 Kubernetes v1.35.0 + containerd v1.7.29 的单节点集群上实际部署验证。
6.1 构建镜像
1
2
3
4
cd i-dra-driver
make build-image
# 或
docker build -t docker.io/lixd96/i-dra-driver:latest .
6.2 前置条件
Kubernetes 1.32+ 且启用 DRA feature gate(v1.34+ 已默认启用) Container Runtime 启用 CDI(containerd v1.7+ 默认启用) 6.3 准备设备文件
在节点上创建测试用的 gopher 设备文件:
1
2
3
mkdir -p /etc/gophers
echo 'hello from gopher-a' > /etc/gophers/gopher-a
echo 'hello from gopher-b' > /etc/gophers/gopher-b
6.4 部署 DRA Driver
1
2
3
4
5
6
7
8
# RBAC
kubectl apply -f deploy/rbac.yaml
# DaemonSet
kubectl apply -f deploy/daemonset.yaml
# DeviceClass
kubectl apply -f deploy/deviceclass.yaml
验证 Driver Pod 已启动:
1
2
3
$ kubectl get pod -n kube-system -l app = i-dra-driver
NAME READY STATUS RESTARTS AGE
i-dra-driver-t654d 1/1 Running 0 9s
查看 Driver 日志,确认设备发现和 ResourceSlice 发布成功:
1
2
3
4
5
6
$ kubectl logs -n kube-system -l app = i-dra-driver
I0520 04:07:44] starting i-dra-driver: node = ecs-a10-sh driver = gopher.example.com device-path= /etc/gophers rescan = 1m0s
I0520 04:07:44] discovered device: gopher-a ( size = 20)
I0520 04:07:44] discovered device: gopher-b ( size = 20)
I0520 04:07:45] published initial ResourceSlice with 2 devices
I0520 04:07:45] i-dra-driver started successfully
6.5 验证 ResourceSlice
1
2
3
$ kubectl get resourceslice | grep gopher
NAME NODE DRIVER POOL AGE
00000-gopher.example.com-ecs-a10-sh-nj7lm ecs-a10-sh gopher.example.com ecs-a10-sh 18s
查看详情,确认设备属性和容量信息:
1
2
3
4
5
6
7
8
9
10
11
12
13
14
15
16
17
18
19
20
21
22
23
24
25
$ kubectl get resourceslice 00000-gopher.example.com-ecs-a10-sh-nj7lm -oyaml
apiVersion : resource.k8s.io/v1
kind : ResourceSlice
spec :
devices :
- attributes :
gopher.example.com/type :
string : gopher
capacity :
gopher.example.com/size :
value : "20"
name : gopher-a
- attributes :
gopher.example.com/type :
string : gopher
capacity :
gopher.example.com/size :
value : "20"
name : gopher-b
driver : gopher.example.com
nodeName : ecs-a10-sh
pool :
generation : 1
name : ecs-a10-sh
resourceSliceCount : 1
可以看到,与 DevicePlugin 只能在 Node capacity 上显示 nvidia.com/gpu: "4" 不同,DRA 的 ResourceSlice 记录了每个设备的完整属性(type=gopher)和容量(size=20)。
6.6 验证 DeviceClass
1
2
3
$ kubectl get deviceclass | grep gopher
NAME AGE
gopher.example.com 9m
查看 DeviceClass 详情,确认 CEL 选择器:
1
2
3
4
5
6
7
8
9
$ kubectl get deviceclass gopher.example.com -oyaml
apiVersion : resource.k8s.io/v1
kind : DeviceClass
spec :
selectors :
- cel :
expression : >-
device.driver == 'gopher.example.com'
&& device.attributes['gopher.example.com'].type == 'gopher'
CEL 表达式定义了"什么样的设备属于这个 Class":driver 是 gopher.example.com 且 type 是 gopher。用户申请资源时只需指定 deviceClassName: gopher.example.com,不需要关心具体的设备名。
6.7 运行测试 Pod
1
kubectl apply -f deploy/test-pod.yaml
验证 Pod 状态:
1
2
3
$ kubectl get pod gopher-test-pod -o wide
NAME READY STATUS RESTARTS AGE IP NODE
gopher-test-pod 1/1 Running 0 15s 172.25.20.52 ecs-a10-sh
查看 ResourceClaim 分配结果:
1
2
3
$ kubectl get resourceclaim
NAME STATE AGE
gopher-test-pod-gopher-claim-9chj8 allocated,reserved 28s
状态为 allocated,reserved,说明调度器已成功分配设备并预留。查看分配详情:
1
2
3
4
5
6
7
8
9
10
11
12
13
14
15
16
17
18
$ kubectl get resourceclaim gopher-test-pod-gopher-claim-9chj8 -oyaml
status :
allocation :
devices :
results :
- device : gopher-a # 分配了 gopher-a 设备
driver : gopher.example.com
pool : ecs-a10-sh
request : gopher
nodeSelector :
nodeSelectorTerms :
- matchFields :
- key : metadata.name
operator : In
values :
- ecs-a10-sh # 绑定到 ecs-a10-sh 节点
reservedFor :
- name : gopher-test-pod # 预留给该 Pod
查看 Pod 日志,确认设备已成功注入:
1
2
3
4
5
$ kubectl logs gopher-test-pod
GOPHER env: gopher-a
Gopher device allocated successfully!
Device file: /etc/gophers/gopher-a
hello from gopher-a
环境变量 GOPHER=gopher-a 通过 CDI spec 注入,文件内容 hello from gopher-a 通过 hostPath volume 读取。整个 DRA 流程从设备注册到 Pod 使用,全链路打通!
进一步在 Pod 内部验证:
1
2
3
4
5
6
7
# CDI 注入的环境变量
$ kubectl exec gopher-test-pod -- env | grep GOPHER
GOPHER = gopher-a
# hostPath volume 挂载的设备文件
$ kubectl exec gopher-test-pod -- cat /etc/gophers/gopher-a
hello from gopher-a
6.8 全链路数据流回顾
从 Driver 启动到 Pod 使用设备,完整数据流如下:
1
2
3
4
5
6
7
8
9
Driver 扫描文件 → ResourceSlice(gopher-a, gopher-b)
↓
Pod 提交 → ResourceClaimTemplate(申请 1 个 gopher)
↓
调度器:匹配 DeviceClass → 选出 gopher-a → 绑定节点 ecs-a10-sh
↓
Kubelet:NodePrepareResources → CDI spec 注入 GOPHER=gopher-a
↓
容器启动:env GOPHER=gopher-a + hostPath /etc/gophers/gopher-a
对比 DevicePlugin 的流程:
1
2
3
4
5
6
7
8
9
DevicePlugin 扫描文件 → ListAndWatch 上报数量(2)→ Node capacity: gopher: "2"
                          ↓
Pod 提交 → resources.requests: gopher: "1"
                          ↓
调度器:只看数量够不够 → 随机选节点
                          ↓
Kubelet:Allocate → 返回 env GOPHER=gopher-a
                          ↓
容器启动:env GOPHER=gopher-a
核心区别:DRA 的调度器在调度阶段就选好了具体设备 并绑定节点,不会出现 DevicePlugin 中"调度到节点后才发现资源不匹配"的问题。
7. 小结
本文通过实现 i-dra-driver,从代码层面对比了 DevicePlugin 和 DRA 的核心差异:
设备发现 :ListAndWatch gRPC 流 → ResourceSlice API 对象调度参与 :kubelet 本地分配 → 调度器全局调度设备注入 :私有 env/mounts → OCI 标准的 CDI spec样板代码 :手动管理 gRPC/kubelet 注册 → kubeletplugin 辅助库一行搞定DRA 的设计理念是让设备信息对调度器可见、让设备注入遵循开放标准、让驱动开发者专注于业务逻辑。虽然目前只在 Kubernetes 1.34 GA,但作为 DevicePlugin 的继任者,DRA 是 Kubernetes 资源管理的未来方向。
系列回顾 :
 意琦行 收录于 Kubernetes