Claude Code 使用 Claude Code Router 对接本地模型完全指南

ccr-demo.png

随着 AI 技术的快速发展,越来越多的开发者希望在本地环境中部署和使用大型语言模型。Claude Code 作为 Anthropic 推出的强大 AI 编程助手,通过 Claude Code Router (CCR) 可以轻松连接到本地部署的模型,实现离线使用和更好的隐私保护。

本文将详细介绍如何通过 CCR 将 Claude Code 连接到本地部署的 DeepSeek-V3.1-Terminus 模型,让你在没有网络连接的情况下也能享受高质量的 AI 编程辅助。

你将学到:

  • Claude Code Router 的基本概念和工作原理
  • 如何在服务器上部署 DeepSeek-V3.1-Terminus 模型
  • 完整的 CCR 配置方法和参数调优
  • 常见问题排查和性能优化技巧

1. 环境准备和工具安装

1.1 安装 Claude Code

首先需要在你的开发机器上安装 Claude Code:

1
2
# 官方安装脚本(需要科学上网)
curl -fsSL https://claude.ai/install.sh | bash

1.2 安装 Claude Code Router

Claude Code Router 是一个 Node.js 包,用于桥接 Claude Code 和本地模型:

1
2
# 需要 Node.js 20+ 版本
npm install -g @musistudio/claude-code-router

1.3 验证安装

安装完成后,验证两个工具是否正常工作:

1
2
3
4
5
6
7
# 检查 Claude Code 版本
❯ claude --version
2.1.51 (Claude Code)

# 检查 CCR 版本
❯ ccr version
claude-code-router version: 2.0.0

2. 模型部署

2.1 模型下载

在服务器上下载 DeepSeek-V3.1-Terminus 模型:

1
2
# 使用 huggingface-cli 下载模型
hf download deepseek-ai/DeepSeek-V3.1-Terminus --local-dir=/raid/lixd/models/DeepSeek-V3.1-Terminus

2.2 vLLM 服务启动

使用 vLLM 框架部署模型服务,确保已安装 GPU 驱动和 NVIDIA Container Toolkit:

 1
 2
 3
 4
 5
 6
 7
 8
 9
10
11
12
13
14
15
16
17
18
19
20
docker run -d \
  --name vllm-deepseek \
  --runtime nvidia \
  --gpus '"device=0,1,2,3"' \
  -p 8000:8000 \
  -p 8001:8001 \
  -v /raid/lixd/models/DeepSeek-V3.1-Terminus:/DeepSeek-V3.1-Terminus \
  --shm-size 16g \
  vllm/vllm-openai:v0.15.1-cu130 \
  --served-model-name DeepSeek-V3.1-Terminus \
  --model /DeepSeek-V3.1-Terminus \
  --enable-auto-tool-choice \
  --tool-call-parser deepseek_v31 \
  --chat-template /DeepSeek-V3.1-Terminus/tool_chat_template_deepseekv31.jinja \
  --tensor-parallel-size 4 \
  --gpu-memory-utilization 0.95 \
  --max-model-len 128000 \
  --host 0.0.0.0 \
  --port 8000 \
  --api-key $apiKey

关键参数说明:

  • GPU 配置:根据实际 GPU 数量调整 --gpus 参数
  • 内存共享--shm-size 16g 确保容器有足够共享内存
  • 模型长度--max-model-len 128000 设置支持长上下文
  • 工具调用--enable-auto-tool-choice--tool-call-parser deepseek_v31 启用工具调用功能
  • 聊天模板:使用 DeepSeek V3.1 专用的工具调用模板
  • 张量并行--tensor-parallel-size 4 在多 GPU 上并行处理

模板文件获取: 从 vLLM 官方仓库下载:tool_chat_template_deepseekv31.jinja

2.3 服务验证

部署完成后,验证服务是否正常运行:

 1
 2
 3
 4
 5
 6
 7
 8
 9
10
11
12
13
14
15
16
17
18
19
20
21
22
23
24
25
26
# 查看可用模型列表
curl http://localhost:8000/v1/models

# 基础对话测试
curl http://localhost:8000/v1/chat/completions \
  -H "Content-Type: application/json" \
  -d '{
    "model": "DeepSeek-V3.1-Terminus",
    "messages": [
      {"role": "user", "content": "你好,请介绍一下你自己"}
    ],
    "max_tokens": 100,
    "temperature": 0.7
  }'

# 流式对话测试
curl http://localhost:8000/v1/chat/completions \
  -H "Content-Type: application/json" \
  -d '{
    "model": "DeepSeek-V3.1-Terminus",
    "messages": [
      {"role": "user", "content": "用一句话解释什么是 Kubernetes"}
    ],
    "max_tokens": 200,
    "stream": true
  }'

如果一切正常,你应该能看到模型的响应输出。

2.4 配置 Claude Code Router

配置说明

核心配置文件如下:

 1
 2
 3
 4
 5
 6
 7
 8
 9
10
11
12
13
14
15
16
17
18
19
20
{
  // LLM 提供商
  "Providers": [
    {
      "name": "openai",
      "baseUrl": "https://api.openai.com/v1",
      "apiKey": "$OPENAI_API_KEY",
      "models": ["gpt-4", "gpt-3.5-turbo"]
    }
  ],

// 路由
{
  "Router": {
    "default": "openai,gpt-4",
    "background": "openai,gpt-3.5-turbo",
    "think": "openai,gpt-4",
    "longContext": "anthropic,claude-3-opus"
  }
}}

完整配置

创建或编辑配置文件 ~/.claude-code-router/config.json

 1
 2
 3
 4
 5
 6
 7
 8
 9
10
11
12
13
14
15
16
17
18
19
20
21
22
23
24
25
26
27
28
29
30
31
32
33
34
35
36
37
38
39
40
41
42
43
44
45
46
47
48
49
50
51
52
53
54
55
56
57
58
59
60
61
62
63
64
65
66
67
68
69
70
71
72
73
74
75
76
77
78
79
80
81
82
83
84
85
86
87
{
  "LOG": true,
  "LOG_LEVEL": "debug",
  "CLAUDE_PATH": "",
  "HOST": "127.0.0.1",
  "PORT": 3456,
  "APIKEY": "",
  "API_TIMEOUT_MS": "600000",
  "PROXY_URL": "",
  "transformers": [],
  "Providers": [
    {
      "name": "vllm",
      "api_base_url": "http://your-server-ip:8000/v1/chat/completions",
      "api_key": "your-api-key",
      "models": [
        "DeepSeek-V3.1-Terminus"
      ],
      "transformer": {
        "use": [
          "enhancetool",
          [
            "sampling",
            {
              "temperature": "0.7",
              "top_p": "0.8",
              "top_k": "20",
              "repetition_penalty": "1.05"
            }
          ]
        ]
      }
    }
  ],
  "StatusLine": {
    "enabled": true,
    "currentStyle": "default",
    "default": {
      "modules": []
    },
    "powerline": {
      "modules": [
        {
          "type": "workDir",
          "icon": "󰉋",
          "text": "{{workDirName}}",
          "color": "bright_blue"
        },
        {
          "type": "gitBranch",
          "icon": "🌿",
          "text": "{{gitBranch}}",
          "color": "bright_green"
        },
        {
          "type": "model",
          "icon": "🤖",
          "text": "{{model}}",
          "color": "bright_yellow"
        },
        {
          "type": "usage",
          "icon": "📊",
          "text": "{{inputTokens}} → {{outputTokens}}",
          "color": "bright_magenta"
        },
        {
          "type": "script",
          "icon": "📜",
          "text": "Script Module",
          "color": "bright_cyan",
          "scriptPath": ""
        }
      ]
    }
  },
  "Router": {
    "default": "vllm,DeepSeek-V3.1-Terminus",
    "background": "vllm,DeepSeek-V3.1-Terminus",
    "think": "vllm,DeepSeek-V3.1-Terminus",
    "longContext": "vllm,DeepSeek-V3.1-Terminus",
    "longContextThreshold": 128000,
    "webSearch": "vllm,DeepSeek-V3.1-Terminus",
    "image": ""
  },
  "CUSTOM_ROUTER_PATH": ""
}

配置说明:

  • API 地址:将 your-server-ip 替换为实际的服务器 IP 地址
  • API 密钥:设置与 vLLM 启动时相同的 API 密钥
  • 路由配置:将所有任务类型都指向本地模型
  • 状态栏:启用自定义状态栏显示工作目录、Git 分支、模型信息等
  • 日志级别:调试阶段可设为 debug,生产环境建议改为 info

3. 开始使用

3.1 启动 Claude Code Router

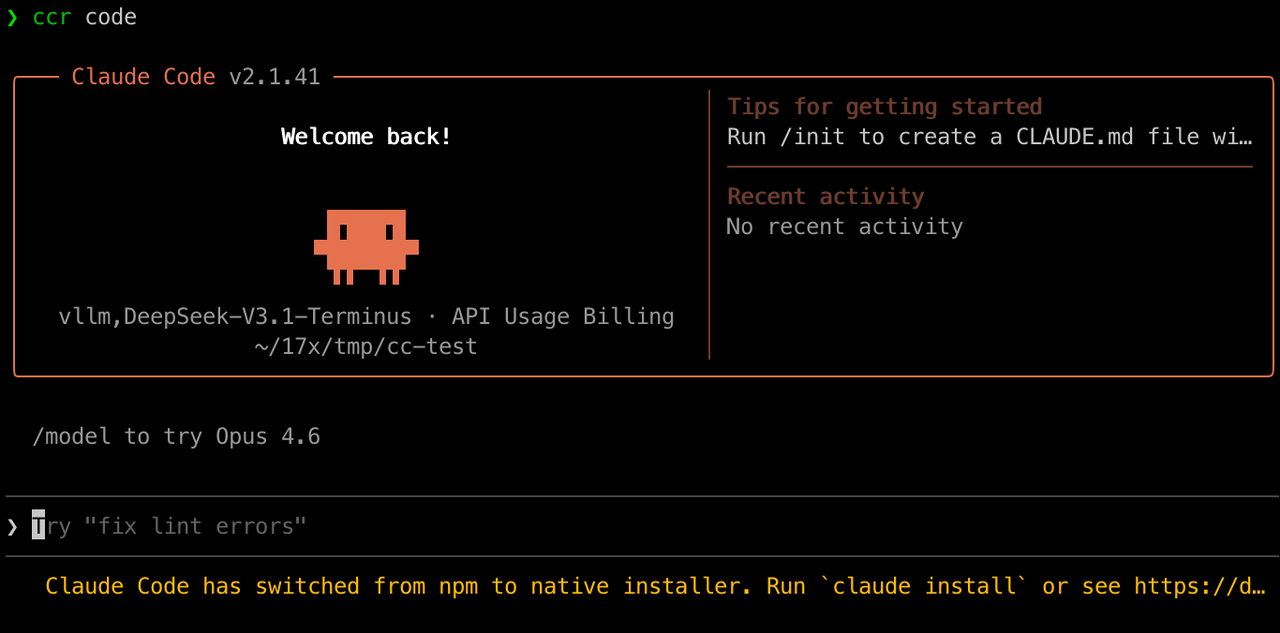
使用 ccr code 替代原来的 claude 命令:

效果如下: ccr-demo.png

启动后,在 claude 界面输入以下命令切换模型

1
/model vllm,DeepSeek-V3.1-Terminus

之后就可以正常使用了。

ps: 不切换模型也可以,只是终端会一直显示用的 Claude 的模型。

4. 常见问题与解决方案

4.1 “Unable to connect to Anthropic services” 错误

如果运行 ccr code 时报错:“Unable to connect to Anthropic services”,可以修改 ~/.claude.json 文件,在最外层添加以下配置:

1
2
3
{
  "hasCompletedOnboarding": true
}

保存后重新运行即可。

5. 小结

本文详细介绍了如何通过 Claude Code Router 将 Claude Code 连接到本地部署的 DeepSeek-V3.1-Terminus 模型,实现了完全离线的 AI 编程助手体验。整个过程涵盖了从环境准备、模型部署到最终使用的完整链路。

除了本地模型之外,Claude Code Router 还支持对接其他 Provider,例如 ModelScope、DeepSeek、ZhipuAI、OpenAI 等等。

0%