import os
import subprocess
import timefrom label_studio_sdk import Client
from label_studio_tools.core.utils.io import get_local_path
def clean_filename(name):
return name.split("__", 1)[-1]# Initialize the Label Studio SDK clientLABEL_STUDIO_URL='http://1.1.1.1:8080/'API_KEY='your-api-key-here'PROJECT_ID=5# Replace with your actual project IDclient= Client(url=LABEL_STUDIO_URL, api_key=API_KEY)project= client.get_project(PROJECT_ID)# 1. Export JSON snapshotsnapshot= project.export_snapshot_create('my_snapshot')export_id= snapshot['id']# Wait until the snapshot is readywhile not project.export_snapshot_status(export_id).is_completed():
time.sleep(1)# Sleep to avoid excessive requests# Download the snapshot# Will get a file like:project-5-at-2025-04-07-08-00-01f7252d.jsonstatus, json_file_path= project.export_snapshot_download(export_id, export_type='JSON')# 2. Convert JSON to YOLO dataset using label-studio-converter# Will convert file like project-5-at-2025-04-07-08-00-01f7252d.json to yolo formatlabel_config_xml= project.params['label_config']xml_file_path='label_config.xml'with open(xml_file_path, 'w') as xml_file:
xml_file.write(label_config_xml)# Run label-studio-converter CLI# Need env LS_UPLOAD_DIRsubprocess.run(['label-studio-converter', 'export',
'-i', json_file_path,
'-o', 'output_yolo',
'-c', xml_file_path,
'-f', 'YOLO'])# 3. Download all images and copy to YOLO images folder# Will download all image into target pathyolo_images_dir= os.path.join('output_yolo', 'images')os.makedirs(yolo_images_dir, exist_ok=True)# Assuming the JSON structure contains a list of tasks with image URLs# for task in project.get_tasks().all():for task in project.get_tasks():
image_url= task['data'].get('image')if image_url:
local_image_path= get_local_path(url=image_url,
hostname=LABEL_STUDIO_URL,
access_token=API_KEY,
download_resources=True,
task_id=task['id'])# Rename imageoriginBasename= os.path.basename(local_image_path)basename= clean_filename(originBasename) print(f'originBasename: {originBasename} basename:{basename}')target_path= os.path.join(yolo_images_dir, basename)# Copy the image to the YOLO images directory print(f'local_image_path:{local_image_path} target_path: {target_path}') os.rename(local_image_path, target_path)print("Conversion and image preparation complete.")
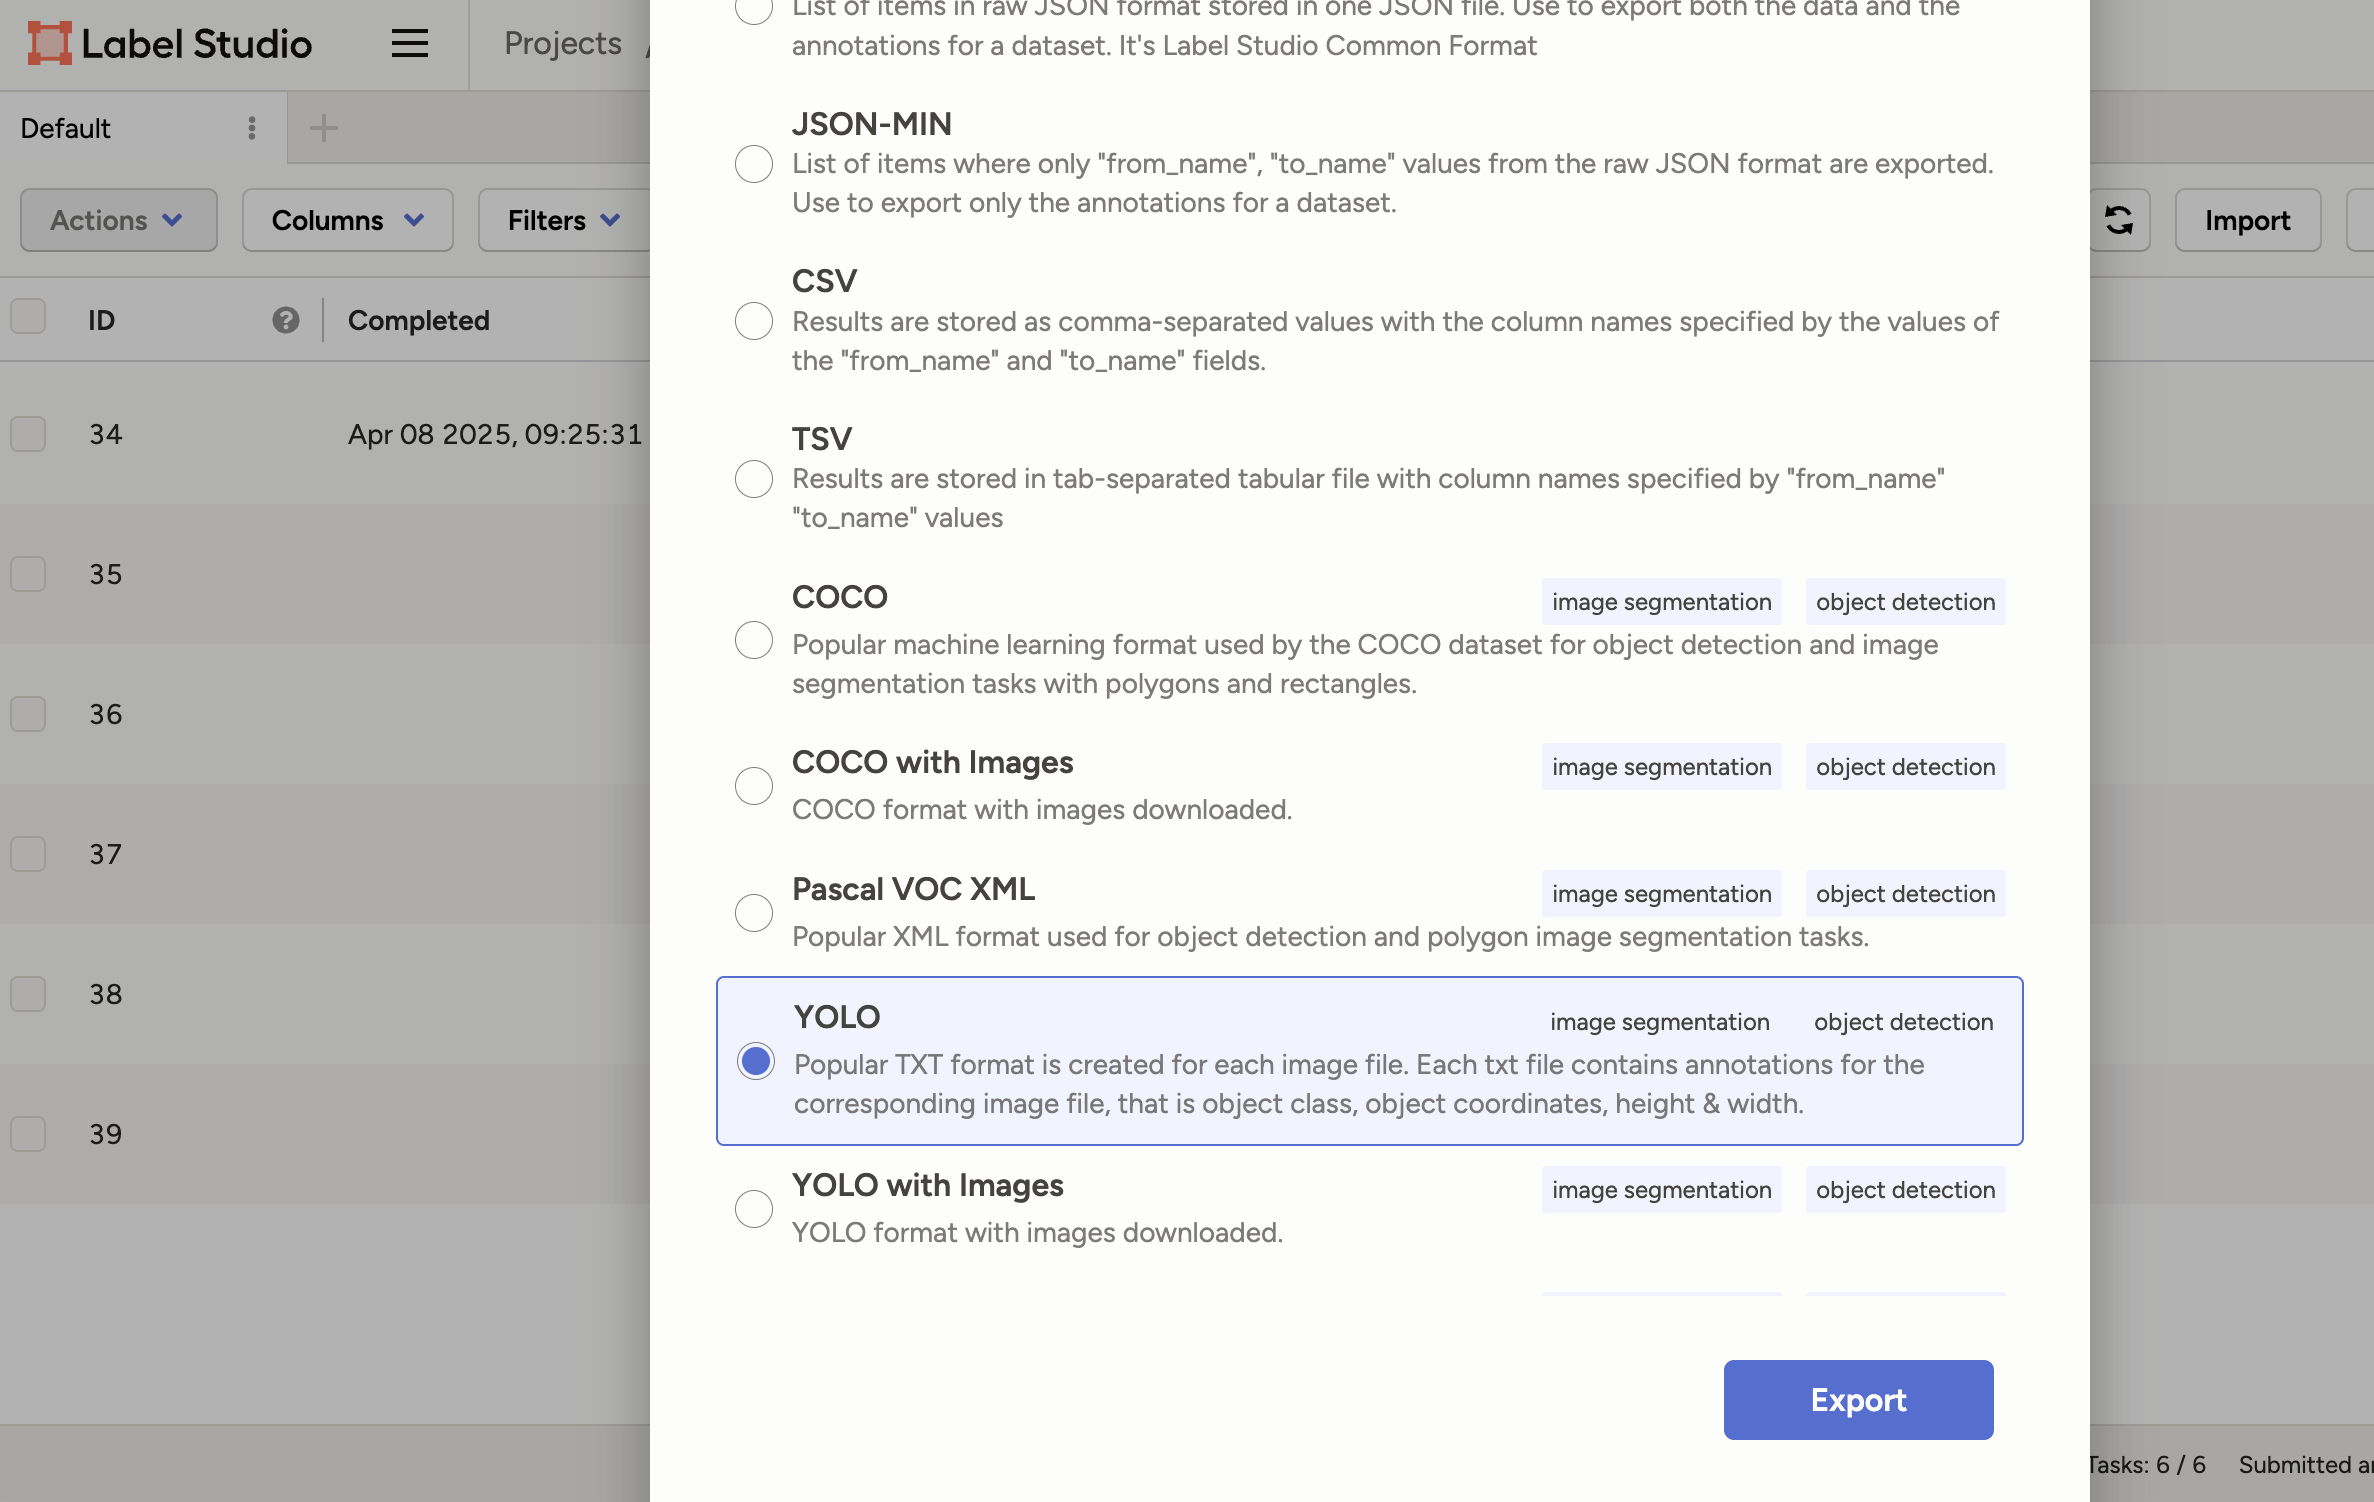
导出前只需要修改以下配置文件:
1
2
3
LABEL_STUDIO_URL='http://1.1.1.1:8080/'API_KEY='your-api-key-here'PROJECT_ID=5# Replace with your actual project ID
# 参考文档:https://docs.ultralytics.com/datasets/detect/#ultralytics-yolo-format# dataset path# path: '' '# dataset root dir(relative to this yaml file)train:images/train# train images (relative to 'path')val:images/val# val images (relative to 'path')test:images/test# test images (optional)# number of classesnc:3# class namesnames:0:Dog1:Cat2:Other
fromultralyticsimportYOLO# Load a model#model = YOLO("yolo11n.yaml") # build a new model from YAMLmodel=YOLO("yolo11n.pt")# load a pretrained model (recommended for training)#model = YOLO("yolo11n.yaml").load("yolo11n.pt") # build from YAML and transfer weights# Train the modelresults=model.train(data="coco8.yaml",epochs=100,imgsz=640)# Train the model with 2 GPUs#results = model.train(data="coco8.yaml", epochs=100, imgsz=640, device=[0, 1])
fromultralyticsimportYOLO# Load a modelmodel=YOLO("/mnt/e015a2b7cb4b49f18419022d3fb045ec/iyolo/yolo11n.pt")# load a pretrained model (recommended for training)# Train the modelresults=model.train(data="/mnt/e015a2b7cb4b49f18419022d3fb045ec/iyolo/mydata/data.yaml",epochs=100,imgsz=640)
将 data 换成我们前面创建的 data.yaml 即可。
输出如下:
1
2
3
4
5
6
7
8
9
10
11
12
13
$ python train.py
100 epochs completed in 0.011 hours.
Optimizer stripped from runs/detect/train2/weights/last.pt, 5.5MB
Optimizer stripped from runs/detect/train2/weights/best.pt, 5.5MB
Validating runs/detect/train2/weights/best.pt...
Ultralytics 8.3.104 🚀 Python-3.10.16 torch-2.6.0+cu124 CUDA:0 (NVIDIA L40S, 48650MiB)YOLO11n summary (fused): 100 layers, 2,582,737 parameters, 0 gradients, 6.3 GFLOPs
Class Images Instances Box(P R mAP50 mAP50-95): 100%|██████████| 1/1 [00:00<00:00, 93.01
all 11 0.011 1 0.995 0.697
Dog 11 0.011 1 0.995 0.697
Speed: 0.2ms preprocess, 5.9ms inference, 0.0ms loss, 1.3ms postprocess per image
Results saved to runs/detect/train2
4.4 推理
用训练后的得到的 best.pt 权重进行推理,使用数据集中的 test 部分进行验证。
1
2
3
4
5
6
7
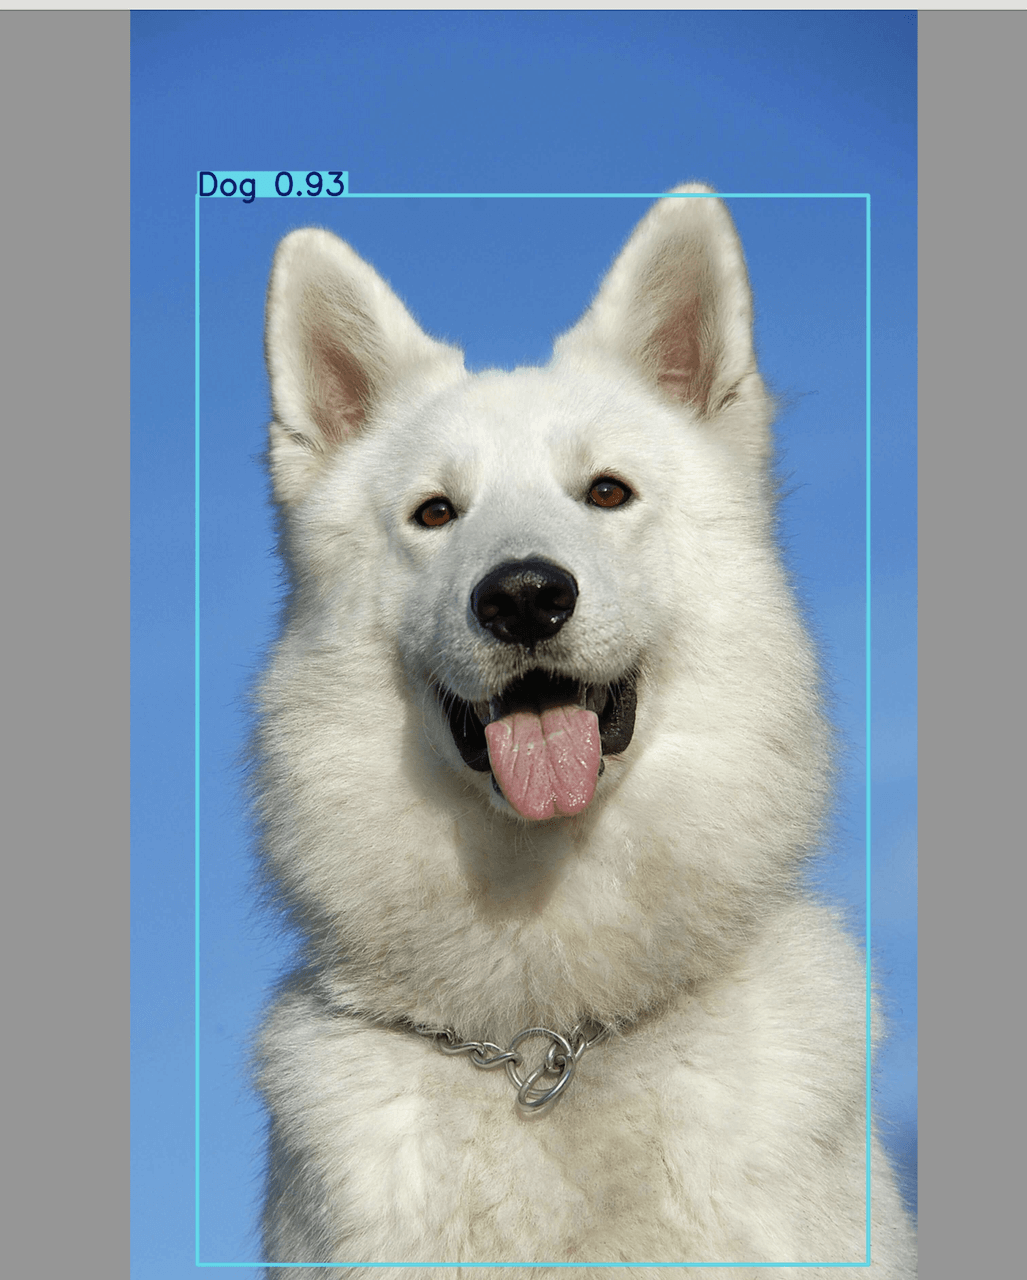
fromultralyticsimportYOLOif__name__=='__main__':model=YOLO('/mnt/e015a2b7cb4b49f18419022d3fb045ec/iyolo/runs/detect/train/weights//best.pt')# build from YAML and transfer weightsmodel.predict(source='/mnt/e015a2b7cb4b49f18419022d3fb045ec/iyolo/mydata/images/test',conf=0.4,save=True)
运行一下,输出:
1
2
3
4
$ python predict.py
image 1/1 /mnt/e015a2b7cb4b49f18419022d3fb045ec/iyolo/mydata/images/test/f43803b2-dog1.jpg: 448x640 1 dog, 1 bed, 51.5ms
Speed: 6.4ms preprocess, 51.5ms inference, 507.8ms postprocess per image at shape (1, 3, 448, 640)Results saved to runs/detect/predict